Connect with Pabbly Connect
Aliveforms extends its capabilities by seamlessly integrating forms with Pabbly Connect.
Prerequisite
- Account on Pabbly Connect
- Workflow created on Pabbly Connect with Webhook
- URL of Webhook
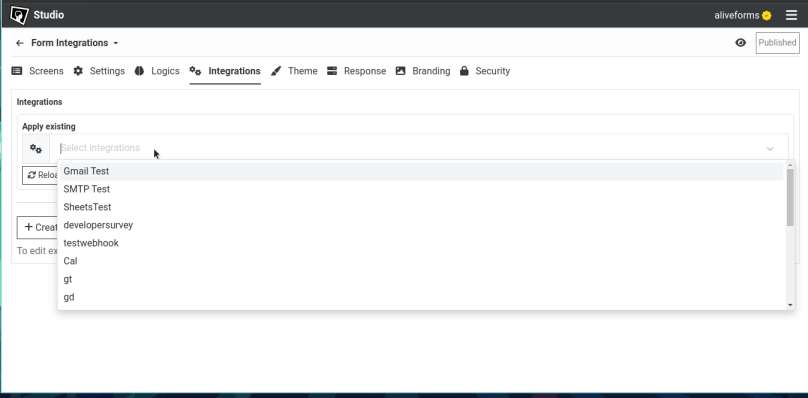
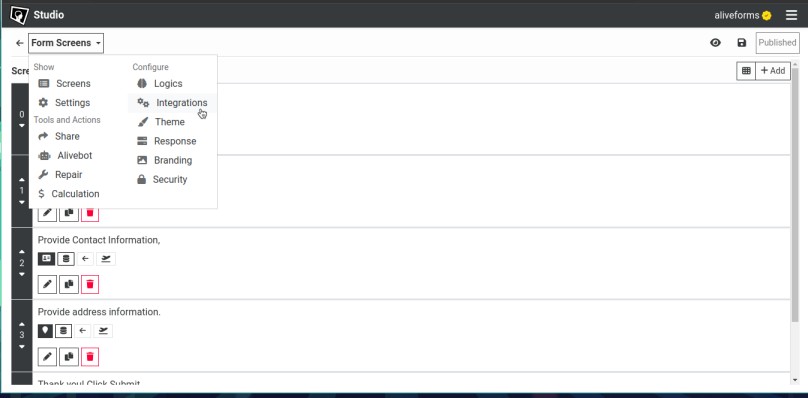
Create new Pabbly Connect Integration
- To create new Pabbly Connect integration in Aliveforms, Either click on
New Integrationfrom dashboard or browseIntegrationsand clickNewbutton.
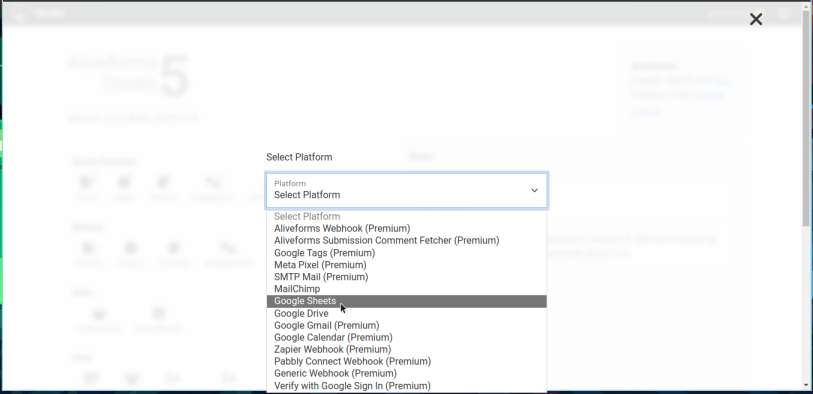 * Select
 Pabbly Connect Integration
Setup in Aliveforms
In Aliveforms Integration Editor, Pabbly Connect integration setup requires
- Webhook URL
- Collection Tags
Configuring
- Start by selecting form helper from dropdown.
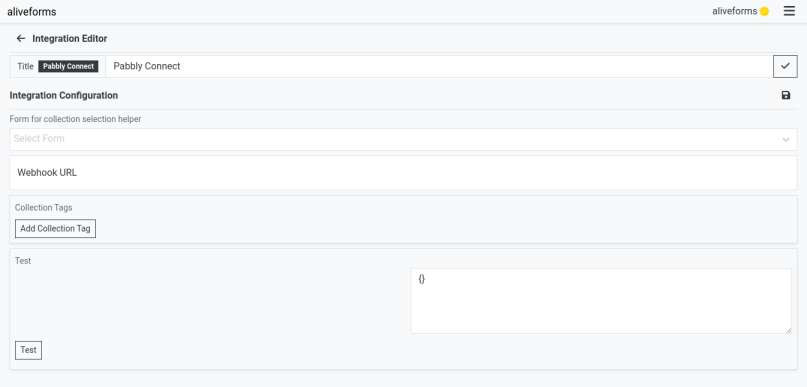
Webhook URL
- Paste the webhook URL you copied from Pabbly.
Collection Index In form, the screen those are marked collectable, they have index. form example
| Screen Index | Screen | Collectable | Collection Index |
|---|---|---|---|
| 0 | Welcome (info) | No | |
| 1 | Email (text input) | Yes | 0 |
| 2 | Ok (info) | No | |
| 3 | Name (text input) | Yes | 1 |
- Email is
[[COLLECTION.0]] - Name is
[[COLLECTION.1]]
If screen is Compound screen e.g. Contact, Address, Compound Inputs, Dynamic List, it is required to provide sub index, For example
| Screen Index | Screen | Collectable | Collection Index |
|---|---|---|---|
| 0 | Welcome (info) | No | |
| 1 | Contact (contact input) | Yes | 0 |
- Email is
[[COLLECTION.0.3]] - Name is
[[COLLECTION.0]] [[COLLECTION.1]]
Collection tags
Collection tags are to configure dynamic information for the integration.
In Pabbly Connect Integrations, you can name collection tags according to needs.
Test Connection
When you add collection tags, you can notice text fields being added in test section. Provide the values and click on test to test the connection. The result will be shown in dropdown.
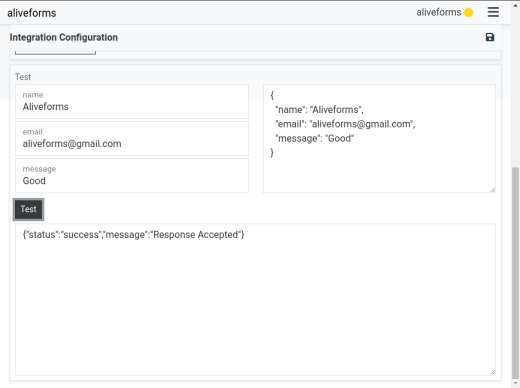
Save the integration
Click on Save icon to save the integration data.
Connect form with Pabbly Connect
- Edit the form where you want to use Pabbly Connect.
- Open
Integrationssettings.
- Select your Pabbly Connect integration and click apply.