Form Settings
If you click on settings button in form editor, there is sidebar displayed.
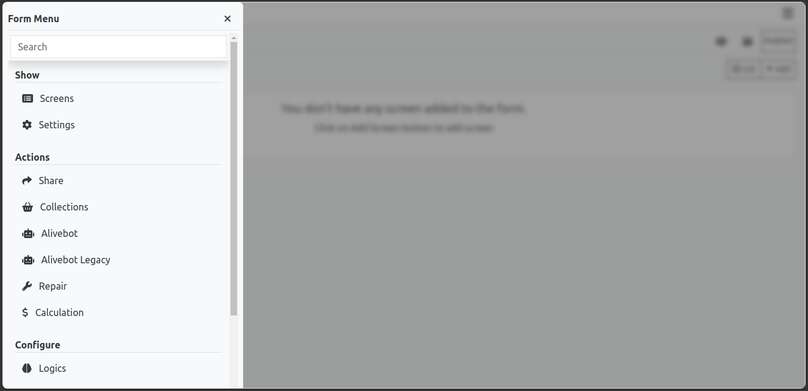
It has different sections like actions, configure, settings/screens toggle.
Actions
Share
This opens the share dialog.
Collections
This redirect users to collections/submission/responses section.
JSON (Alivebot)
This is to edit JSON of form.
YAML (Alivebot Legacy)
This is to edit YAML of form.
Repair
This is to perform repairing action on form.
Calculation
This is to show approximated credits fee of form presentation and collection.
Settings
When opened form settings, these are general settings shown.
Publish
Upon creation a form in in unpublished state. When testing form, keep it unpublished because it won't cut credits. After testing is complete, publish the form by checking the form and click apply.
Note
Note that an unpublished form cannot be submitted.
Single Page
Aliveforms can show a form in single screen. This will though limit the scope of logic units.
Allow Sharing
If allow sharing is checked, the share button in shown on form to share the form and also it puts the link of form in Aliveforms browse section.
Avoid Submission
When enabled, form submission is disabled.
Allow web browser's Back button
When enabled, previous question in shown on back button press.
Load solutions to access via JavaScript API
If enabled, solution key is loaded with form on client's device. Logics can be used to enable functionality like showing correct answers on client side etc. Note that each setting is required to be applied individually by clicking on apply button in front of that setting element.
Response Management
This is to set the message which is shown upon form submission. It can use variable and calculations in title and image and layout.
Logics
Applying Logic
To apply logics on your form, click on logic drop down. check/select the logics you want to apply. After selecting click on apply button.
Removing Applied Logic
To remove logic that is already applied, click on logics drop down and uncheck the logic you want to remove. Click on apply button.
Integrations
Applying integration
To apply integrations on your form, click on integration drop down. check/select the integrations you want to apply. After selecting click on apply button.
Removing Applied integration
To remove integration that is already applied, click on integrations drop down and uncheck the integration you want to remove. Click on apply button.
Theme
Applying theme
To apply theme on your form, click on theme drop down. select the theme you want to apply. After selecting click on apply button.
Removing Applied theme
To remove theme from form, click on themes drop down and select option None. Click on apply button.
Branding
While presenting Aliveforms, you can control whether to show your organization name and logo and Aliveforms branding in form or hide these.
Title
This is the title of form. It is also the title of web page shown in title bar of browsers and previews. To change the title, edit the title in text box and then click on apply or update button in front of the text box.
Preview Photo
This photo is shown in preview area when shared on other websites supporting preview via OpenGraph. Check Image Selector section for information on how to update photos.
Aliveforms Branding
To let form show powered by Aliveforms branding, keep remove Aliveforms branding unchecked. If you don't want to show Aliveforms branding check the remove Aliveforms branding checkbox and Click apply.
Organization Branding
To have your form showing your organization branding, keep Show organization branding checked. If you don't want to show your organzation branding uncheck the show organization branding checkbox and Click apply.
Security
This tab has password protection settings.
Password Protection
Aliveforms allows to apply a password on form to make it password protected.
Applying Password
To make a form password protection, click on checkbox in Password protection section. type the password and click apply.
Removing Password Protection
To remove password protection, uncheck the password protection checkbox and click apply.